How to Clean Lasko Ion Tower Fan
Is your Lasko ion tower fan blowing weak air, making more noise than usual, or vibrating oddly? Chances are it is overdue for a deep clean. Over time, dust and debris accumulate on the blades, inside the motor housing, and across internal vents, restricting airflow, increasing strain on the motor, and even posing a potential fire hazard. A thorough cleaning can restore peak performance, reduce noise, and extend the life of your fan. While basic maintenance can be done without opening the unit, real results come from internal access, which means disassembling key components. This guide walks you through every step from safety precautions to reassembly so you can clean your Lasko ion tower fan like a pro and get it running like new again.
Essential Safety Steps Before Cleaning
Before touching any tool, prioritize safety. Electrical devices like tower fans pose risks if mishandled during cleaning.
Unplug and Cool Down Completely
Always unplug the fan from the wall outlet before starting. If your model includes a heating function or has been running for hours, let it cool completely, especially around the base and motor area. Never clean a warm or plugged-in unit. This step prevents electrical shock and protects internal components from heat damage.
Understand the Warranty Implications
Opening your Lasko fan may void the manufacturer warranty. Official guidelines often recommend only external cleaning. However, for older or out-of-warranty units where performance has declined, internal cleaning is necessary. Weigh the trade-off: restore full function now or preserve warranty coverage on a struggling unit.
Gather the Right Tools for the Job
Using the correct tools prevents damage and ensures full access. Lasko uses non-standard screws on many models, so a basic screwdriver alone will not cut it.
Must-Have Tools List
You will need several specific tools to properly disassemble and clean your Lasko ion tower fan. A Phillips head screwdriver with a 4-inch blade is recommended for reaching deep-set screws at the top. A spanner screwdriver set is required for security screws with partial slots, which are common on side panels. For specific models like the T42902 Windcurve, a T15 Torx screwdriver is needed. A plastic prying tool safely separates plastic casing without cracking it. A magnetic tray or small magnet retrieves screws from recessed holes. A soft brush such as a makeup or paintbrush cleans blades without scratching. Microfiber cloths or damp paper towels wipe down surfaces. Compressed air or an air compressor blows dust from the motor housing. A shop vacuum with a brush attachment removes loose debris. A garden hose or sink rinses removable parts.
Pro Tip: Invest in a $10 to $11 spanner set. It pays off in future cleanings and makes removal of those tricky security screws much easier.
Identify Your Lasko Model First
Cleaning steps vary by model. Confirm yours before disassembling to avoid damaging screws or components.
Common Models and Their Fastener Types
Different Lasko models use different screw types. Standard Lasko tower fans typically use Phillips and spanner screws, with four side screws, two handle screws, and two top screws. The Lasko 2517 (40-inch) uses Phillips screws plus one security screw. The Lasko T42902 Windcurve uses Phillips screws plus two T15 Torx screws and washers. If you are unsure, inspect the back or side panels for screw types before proceeding.
| Model | Screw Types | Key Notes |
|---|---|---|
| Standard Lasko Tower Fans | Phillips + Spanner | 4 side, 2 handle, 2 top screws |
| Lasko 2517 (40-inch) | Phillips + 1 security screw | Back panel removal |
| Lasko T42902 Windcurve | Phillips + 2 T15 Torx + washers | Base platform with crisscross tightening |
Remove the Back Cover

Access begins with removing the outer casing. The method depends on your specific model.
Standard Models: Side and Top Screw Removal
For standard models, remove four screws from the side panel, two screws near the handle, and two screws at the top using a long Phillips screwdriver. Check for spanner-type screws and do not force Phillips into them. Use a plastic prying tool to gently separate the casing halves and work around the edges to release internal clips.
Lasko 2517: Back Panel Screw Pattern
For the 2517 model, locate two Phillips screws at the top, one in the top left, two at the bottom, and one unique security screw in the top right. Remove all screws, then insert a prying tool at the bottom edge and gently release clips. Lift the back cover straight off.
Model T42902: Clamshell Design Approach
For the T42902 Windcurve, remove screws from the back, sides, and base. Use a T15 Torx driver for two specific screws. Retrieve recessed screws with a magnet. Lay the fan on its side and wiggle the back panel free.
Warning: Never force the casing. If it resists, double-check for missed screws or hidden clips.
Extract the Fan Blade Assembly
With the casing open, you can access the core components: the blade column and motor. This is where most performance issues originate.
Standard Disassembly Steps
Locate the bracket holding the blade column and remove the two Phillips screws securing the bracket. Loosen but do not remove the base screw. Slide the entire blade assembly off the motor shaft.
Critical Detail: The motor shaft has a flat spot. During reassembly, the blade set screw must align with this flat area. Otherwise, the blade will slip and cause wobbling.
T42902-Specific Removal Process
Unplug the small power pack secured with Phillips screws. Remove four screws holding the motor housing shield. Lift the shield carefully, checking for wires underneath. Remove remaining screws and gently pull out the entire fan assembly.
Deep Clean the Fan Blades
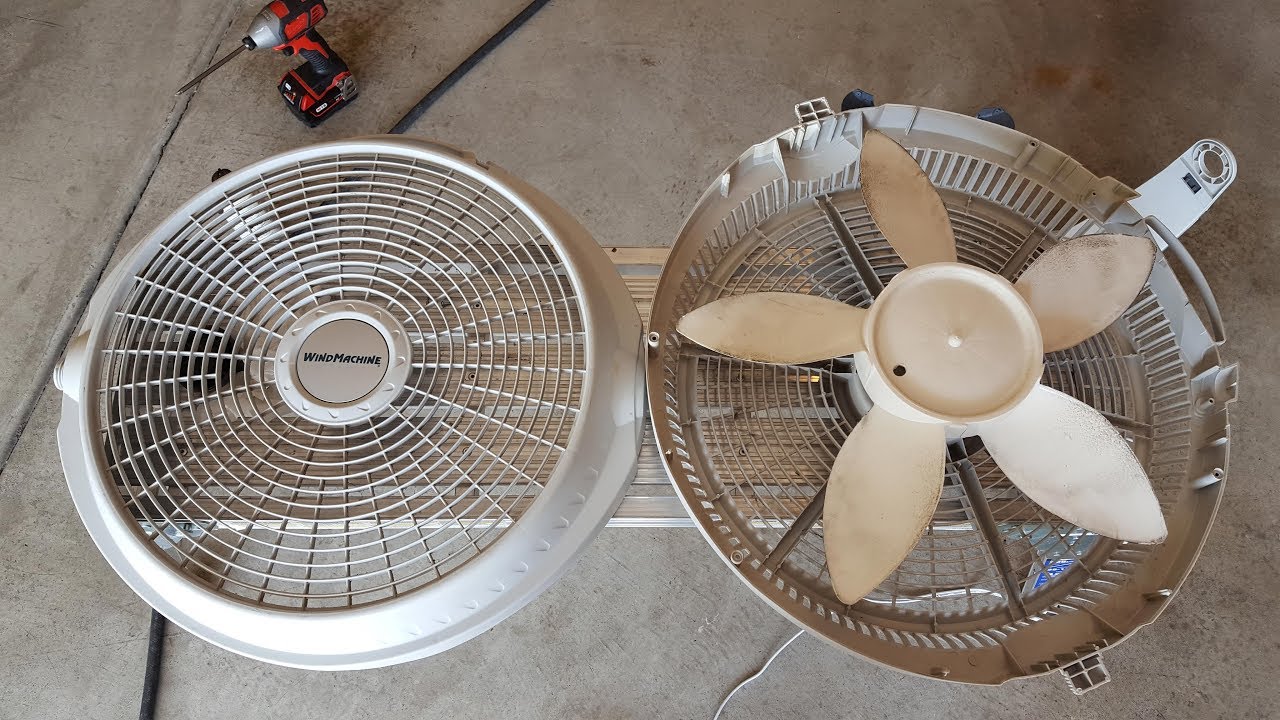
Dust buildup on blades is the number one cause of poor airflow and increased noise. This step is essential for restoring performance.
Scrub and Wipe Each Blade
Use a soft brush to scrub each blade thoroughly. For caked-on grime, use the flat edge of a spanner tool as a gentle scraper. Wipe blades with a microfiber cloth dampened with water or mild cleaner such as Simple Green. Use cotton swabs to clean tight spaces near the hub and between blades.
Never soak metal parts or let water enter the motor housing.
Rinse and Dry Completely
Remove plastic blade assemblies and rinse them under a garden hose or sink. Shake off excess water. Dry completely in direct sunlight, which kills mold and ensures no moisture remains. Reassemble only when parts are 100% dry to prevent electrical damage.
Clean the Motor Housing and Internal Vents
This is where most dust hides, and where compressed air delivers the best results.
Blow Out Dust With Compressed Air
Use compressed air or an air compressor to blast dust from the motor housing, rear guard, internal vents, and around the motor shaft. Hold the can upright and use short bursts to avoid moisture buildup.
Vacuum and Wipe Remaining Debris
Use a shop vacuum with a brush attachment to pull out loosened debris. Wipe accessible plastic surfaces with a dry or slightly damp cloth. Avoid touching motor windings or electrical connections.
Never spray liquids inside the housing. This can short the motor and cause permanent damage.
Clean Heating Elements Safely (If Applicable)
Some Lasko fans include heating functions. Clean these with extra caution.
Dry Cleaning Only for Heaters
Only clean heating elements if the manual allows and the element is exposed. Use a dry cloth or soft brush only. Never use water, cleaners, or damp cloths on heating coils. Ensure the element is completely dry before reassembly. Moisture on heating elements can cause shorts or fire hazards.
Reassemble Your Fan With Precision

Rushing reassembly leads to noise, vibration, or damage. Take your time with this critical phase.
Align the Blade Properly
Slide the blade column back onto the motor shaft. Align the set screw with the flat spot on the shaft. This is non-negotiable for stable rotation. Reattach the bracket with two Phillips screws.
Close the Casing Securely
Snap the back cover into place, ensuring all internal clips engage. Replace all screws in their original locations. Use a magnet to avoid dropping screws into the housing. Tighten screws firmly but avoid over-tightening, which can crack plastic.
T42902-Specific Reassembly Tips
For the Windcurve model, washers matter. Two screws have small washers. Keep them separate and reinstall correctly. Base platform screws are unique, so do not mix them with others. Tighten in a crisscross pattern to prevent warping. Gently wiggle the rear guard to confirm it is flush and secure.
Optional Upgrade: Replace spanner screws with standard Phillips screws for easier future access. Note that this may affect the warranty.
Test Before Final Closure
Test the fan before fully sealing it to catch any alignment issues immediately.
Final Operational Checks
Perform a visual inspection to ensure no tools, cloths, or debris are left inside. Plug in and power on. Listen for smoother operation, reduced humming or rattling, and no unusual smells. Feel for stronger airflow and minimal vibration. Verify oscillation moves smoothly if your model has this feature.
If issues persist, power off and recheck alignment, washer placement, and secure connections.
Maintenance Schedule and Best Practices
Keep your fan running efficiently with regular care. Consistent maintenance prevents performance decline and extends the life of your unit.
How Often to Clean
For external cleaning of grills and vents, clean every 1 to 2 months. For deep internal cleaning, perform this every 3 to 6 months, or every 1 to 2 years for light use environments.
| Cleaning Type | How Often |
|---|---|
| External (grills, vents) | Every 1 to 2 months |
| Deep internal clean | Every 3 to 6 months |
Preventative Tips for Longevity
Vacuum front and rear grills monthly with a brush attachment. Use compressed air quarterly to blow out settled dust. Store in a dry, dust-free area when not in use. Clean more often in homes with pets or high dust levels.
Long-Term Benefit: Regular cleaning reduces motor strain, cuts energy use, and can extend your fan life by years.
Troubleshooting Common Post-Clean Issues
Even with careful work, problems can arise. Here is how to address them.
Fan Vibrates Excessively
This is usually caused by misaligned blades, a loose bracket, or a missing washer. Recheck blade alignment on the flat spot. Ensure bracket screws are tight. Verify washer placement, especially on T42902 models.
Noisy Operation After Cleaning
Debris still in the motor housing or misaligned casing typically causes this. Blow out the housing again and ensure the back cover is fully snapped in.
Weak Airflow Persists
Incomplete cleaning or the blade not fully seated on the shaft causes this issue. Re-remove the blade and clean again. Confirm it is pushed all the way onto the shaft.
Fan Will Not Turn On
A loose wire, unseated power pack, or remaining moisture causes this. Check all connections. Ensure the unit is completely dry. Verify the power outlet works.
Key Takeaways for Cleaning Your Lasko Ion Tower Fan
Cleaning your Lasko ion tower fan is not just about dust removal. It is about restoring performance, ensuring safety, and extending the life of your appliance. With the right tools, including a spanner screwdriver set for those tricky security screws, and a methodical approach, you can deep clean even the most stubborn models. Whether you own a standard Lasko tower, a 2517, or the T42902 Windcurve, this guide gives you the exact steps to reclaim strong airflow and quiet operation.
Remember the critical details: always unplug and cool down before cleaning, align the blade set screw with the flat spot on the motor shaft during reassembly, and ensure all parts are completely dry before powering on. Regular maintenance prevents costly replacements and keeps your space cool and comfortable year after year. Now that it is clean, set a reminder. Your next deep clean should be just 3 to 6 months away.
Frequently Asked Questions About Cleaning Lasko Ion Tower Fans
Can I clean my Lasko tower fan without disassembling it?
Yes, you can perform external cleaning by vacuuming the front and rear grills and using compressed air to blow dust out of vents. This is recommended every 1 to 2 months. However, this will not address dust buildup on the blades or inside the motor housing, which is the main cause of reduced airflow and increased noise.
What tools do I need to deep clean a Lasko ion tower fan?
You will need a Phillips head screwdriver, a spanner screwdriver set for security screws, a T15 Torx driver for specific models like the T42902, a plastic prying tool, a soft brush, microfiber cloths, compressed air, a shop vacuum, and access to a garden hose or sink for rinsing removable parts.
How do I know if my Lasko fan needs deep cleaning?
Signs that your fan needs deep cleaning include weak airflow despite high speed settings, unusual grinding or rattling noises, excessive vibration, a burning smell, or the fan running hotter than usual. These symptoms indicate dust buildup restricting airflow or causing motor strain.
Will opening my Lasko fan void the warranty?
Yes, opening your Lasko fan may void the manufacturer warranty. Official recommendations suggest only external cleaning. However, for out-of-warranty units where performance has declined significantly, internal cleaning is necessary to restore function.
How often should I deep clean my Lasko tower fan?
For optimal performance, deep clean your Lasko tower fan every 3 to 6 months. In dusty environments or homes with pets, consider cleaning more frequently. External vacuuming and compressed air treatment should be done monthly.