How to Make a Tower Fan Cooler
You’re sweating through another hot summer night, but your air conditioner is either too expensive to run or not even an option. A standard tower fan helps with airflow, but it doesn’t actually cool the air. What if you could turn that same fan into a DIY air cooler for just a few dollars? With the right techniques, you can make a tower fan cooler by leveraging basic physics and household materials.
The key lies in evaporative cooling and conductive heat transfer, methods that actively lower air temperature rather than just moving warm air around. Whether you’re in a dry climate where evaporation thrives or a humid one where ice-based cooling works best, there are proven, low-cost ways to boost your tower fan’s performance. From simple plastic bottle hacks to advanced PVC builds, this guide delivers actionable methods backed by science.
Core Cooling Principles Explained
Before building any system, understand how cooling actually works with fans.
Why Fans Do Not Cool Air Alone
A tower fan circulates air and creates a wind-chill effect on your skin, making you feel cooler. However, it does not reduce the ambient temperature. To truly cool the air, you need heat transfer, either through evaporation or direct contact with cold surfaces.
Evaporative Cooling Works Best in Dry Air
When warm air passes over water, evaporation occurs. The phase change from liquid to vapor absorbs heat, lowering the air temperature. This method is most effective when humidity is below 60 percent. In dry climates, expect up to 10 degrees Fahrenheit of cooling.
In humid areas, the air is already saturated, so evaporation slows or stops. That’s when conductive cooling becomes your best bet.
Conductive Cooling Uses Ice-Powered Chill
Place ice in front of or around your fan. As air flows over the frozen surface, heat transfers from the air to the ice, cooling the outgoing breeze. This works in all climates, including humid ones.
Use frozen saltwater bottles instead of plain ice. Salt lowers water’s freezing point, creating a longer-lasting slush that absorbs more heat.
Maximize Air Contact for Better Results
Cooling efficiency depends on how much time air spends in contact with the cooling medium. Methods that increase surface area, like spiral airflow paths, wet sponges, or hanging ice bottles, deliver stronger results.
Plastic Bottle Ice Hack: Quick and Cheap

Turn recyclable bottles into a powerful cooling upgrade in minutes.
Cut Bottles Into Ice Holders
Grab two 1.5L or 2L plastic bottles. Cut each just below the midpoint. The bottom half holds ice and water, while the top half acts as a funnel. Keep the cap on the top section.
For better airflow, poke 100 to 150 small holes in the top half using a nail or soldering iron. This allows air to be drawn through the icy chamber before entering the fan.
Mount Bottles at Fan Intake
Position the funnel halves over the rear intake of your tower fan. Tape or wire them securely on both sides. Make sure no part blocks the motor or blades.
When the fan runs, you should see slight condensation forming on the bottles, proof that cooling is happening.
Fill With Ice and Cold Water
Pour ice cubes into the bottom halves, then add cold water to fill gaps. The water improves thermal conductivity, helping the ice absorb heat more efficiently.
Add three tablespoons of salt to water before freezing. The resulting slush stays colder longer.
Drain Melted Water Easily
Unscrew the cap on the lower bottle to drain water without removing the setup. Place a tray underneath to catch drips and prevent slipping.
Cooling lasts two to three hours per ice batch. Keep backup bottles frozen for quick swaps.
Hanging Ice Bottle System

Prefer a cleaner, reusable design? Hang frozen bottles directly on the fan.
Drill Holes for Controlled Melting
Use a quarter-inch drill bit to make rows of holes around the upper half of each bottle. Space rows a quarter inch apart. These holes let air pass through while holding ice inside.
Always drill with the bottle empty and supported. Wear gloves and eye protection.
Secure With Wire or String
Turn off the fan. Thread wire or strong string through opposing holes and tie it around the fan’s front or side grating. Tie one bottle on each side of the motor housing.
Use a second string around the neck for stability. Ensure bottles do not wobble or risk falling into the blades.
Load Ice, Not Water
Fill bottles with ice cubes only, up to just below the hole line. Overfilling causes rapid melting and leaks.
Place a shallow bowl beneath to catch condensation. Refill ice every two hours in extreme heat.
Advanced PVC Tower Cooler Build
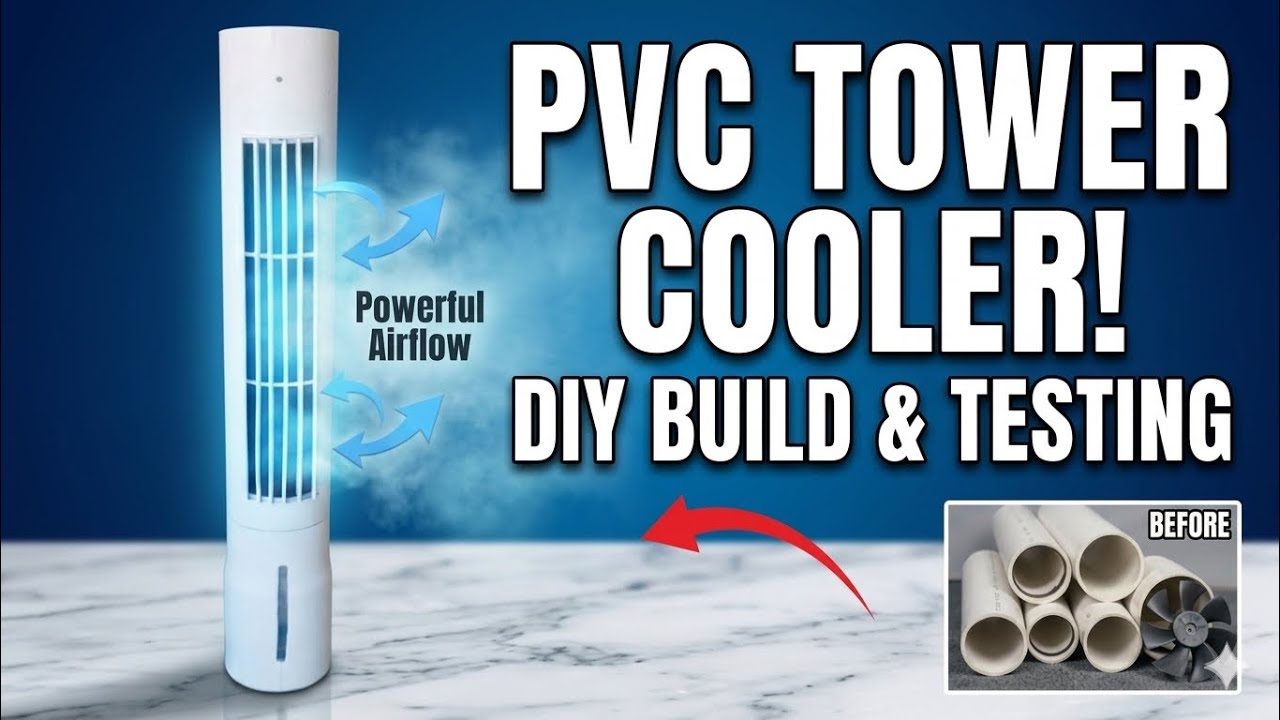
For a permanent, high-efficiency solution, build a dedicated cooling tower.
Build a Sturdy PVC Frame
Cut four 30 cm by 21 cm PVC sheets and glue them vertically to a 30 by 30 cm base to form a box. Seal all joints with super glue, then reinforce with hot glue to prevent leaks.
Attach L-shaped PVC corners to raise height. Add front, back, and side panels to complete the shell.
Make the front outlet narrow to increase airflow velocity and cooling focus.
Install Fan and Motor Securely
Mount a tower fan motor and blade on the base using metal brackets. Align perfectly to prevent vibration.
Use the manufacturer’s bushing and locking screw. Add a metal support frame with nuts and bolts for stability.
Misalignment causes noise and wear. Test without cover first.
Add Automatic Swing Mechanism
Create a rotating front frame with five PVC strips pinned at both ends. Attach a central support bar to prevent sagging.
Link the strips with a long thin PVC rod for synchronized motion. Connect a servo motor, five volt, via a bent metal rod to drive left-right swing.
Use a switch to toggle swing on and off independently.
Mount Cooling Pads and Pump
Due to space limits, mount evaporative cooling pads externally on the sides. Sandwich pads between aluminum mesh sheets and attach to PVC frames.
Place a submersible water pump in the base reservoir. Connect to side pipes with drilled holes using a T-connector for even water distribution.
Set Up Water Management
Cut a transparent viewing window in the front panel to monitor water level.
Add a refill port on the back, covered by a small PVC box. This keeps the system sealed but serviceable.
Use distilled water to reduce mineral buildup on pads.
Wire the Electrical System Safely
Power the water pump with direct AC. Connect the main fan motor to a speed controller with a potentiometer. Power the servo motor with five volt via USB adapter.
Mount all components on a central control board inside a sealed PVC box. Use hot glue to insulate connections.
Install a main power switch and attach a labeled top cover for easy access.
PVC Spiral Cooler: Simpler Structural Option

Want a middle ground between hack and build? Try the spiral design.
Assemble a Zigzag Air Path
Use two-inch diameter PVC pipes, cut to 36 inches. Connect with 90-degree elbow joints to create a spiral or zigzag path.
This design forces air to travel longer, increasing contact with cooling surfaces.
Seal Base and Mount Fan on Top
Cap the bottom with a PVC end cap. This becomes your water reservoir. Seal the top with another cap.
Drill a hole slightly smaller than your four to six inch axial fan. Insert and seal with silicone or PVC cement. Fan should blow outward.
Line With Absorbent Material
Stuff inner walls with sponges, felt, or cotton batting. Soak thoroughly before use.
Add a mesh tray at the bottom to hold material and prevent clogging.
Keep Water Cool and Fresh
Fill the base with refrigerated water. Add ice cubes for instant cooling.
Change water daily to prevent bacteria and mold.
Boost Cooling With Smart Room Tactics
Even the best fan needs environmental support.
Create Cross-Ventilation
Open windows on opposite sides of the room. Place one fan as an intake pulling cool air in, and another as an exhaust pushing hot air out.
Do this in early morning or late evening when outside air is cooler.
Exploit Heat Rising
Hot air accumulates near ceilings. Run your tower fan on high and point it upward to push heat out through open upper windows.
Open lower windows to draw in cooler air from outside.
Pair Fan With Dehumidifier in Humid Climates
In humidity above 60 percent, evaporation fails. But dry air feels cooler.
Run a dehumidifier alongside your fan. Lower moisture lets sweat evaporate faster, enhancing the wind-chill effect.
Optimize With Pro Cooling Hacks
Go beyond basics with these expert tricks.
Use Frozen Saltwater Bottles
Freeze saltwater, three tablespoons per liter, in bottles. It forms a slush that stays colder longer than regular ice.
Place in front of fan or inside cooling chambers.
Salt disrupts ice crystal formation, lowering the freezing point and increasing heat absorption.
Drape a Damp Towel Over Fan
In dry climates, hang a thin, damp cotton towel over the front grill. Air passing through evaporates the water, dropping temperature.
Never use soaking-wet fabric. It can drip into electrical parts.
Place Bowls of Ice in Airflow
Set a shallow bowl of ice directly in front of the fan. The wide surface area maximizes cooling.
Add a few drops of peppermint oil for a refreshing scent and enhanced cooling sensation.
Prevent Common Problems
Avoid pitfalls that reduce performance or create hazards.
Fix Leaks With Better Sealing
If water drips from PVC joints, reinforce with silicone sealant. Ensure the base is level. Use hot glue on internal seams.
Run without water first to check structural integrity.
Stop Vibration and Noise
If the fan shakes, tighten the blade locking screw. Recheck motor alignment. Add rubber washers between brackets and base.
Balance the blade manually if it wobbles.
Extend Cooling Duration
If ice melts too fast, pre-chill water before freezing. Use saltwater bottles. Increase ice-to-water ratio. Keep backup bottles in freezer.
Safety First: Critical Warnings
Never compromise on safety when modifying electrical devices.
Prevent Electrical Hazards
Seal all wires with hot glue. House electronics in waterproof PVC boxes. Keep pump and motor circuits separated if not using a controller.
Never operate near water sources without proper insulation.
Avoid Blade Obstruction
Do not hang bottles or towels that could fall into spinning blades. Always test stability before turning on.
Eliminate Slip Risks
Place trays or mats under ice setups. Check for condensation buildup daily.
Stop Mold and Bacteria
Stagnant water breeds harmful microbes like Legionella.
Change water every 24 hours. Clean reservoirs with vinegar or bleach solution weekly. Never leave water sitting for more than two days.
Compare Methods: Choose Your Best Fit
| Feature | Bottle Ice Hack | PVC Tower | Spiral Cooler | Ice Bowl + Fan |
|---|---|---|---|---|
| Cooling Drop | 5 to 10 degrees F | High | Moderate | Mild |
| Cost | Under $5 | $50 plus | Under $20 | Under $5 |
| Build Time | 10 minutes | 4 plus hours | 1 hour | 2 minutes |
| Best For | Quick relief | All-day cooling | Balanced build | Minimal effort |
| Humidity Suitability | All | Dry only | Dry only | All |
Dry climate? Go for evaporative pads, the PVC builds. Humid? Stick with ice-based conductive cooling. Need a fast fix? The plastic bottle hack wins. Want permanent? Build the PVC tower.
Final Tips for Lasting Cool
Clean blades monthly. Dust reduces airflow by up to 30 percent.
Choose low-noise fans, under 1.5 sones, for bedrooms. Run cooling systems only when occupied to save energy. Combine with blackout curtains and ceiling fans for full climate control.
You do not need central AC to stay comfortable. With smart modifications, your tower fan can deliver real cooling, quietly, safely, and affordably.
Now that you know how to make a tower fan cooler, pick a method that fits your space, climate, and skill level. Build it, test it, and beat the heat without the high electric bill.
Frequently Asked Questions About Making a Tower Fan Cooler
Does a tower fan actually cool the air?
A standard tower fan only circulates air and creates a wind-chill effect on your skin. It does not lower the actual room temperature. To cool the air, you need to add a cooling medium like ice or wet pads that use evaporative or conductive cooling.
What is the cheapest way to make a tower fan cooler?
The plastic bottle ice hack is the most affordable option. It costs under five dollars and uses recyclable materials you likely already have. Simply cut bottles, add ice, and mount them at the fan intake.
Which cooling method works best in humid climates?
Ice-based conductive cooling works best in humid climates. Evaporative cooling becomes ineffective when humidity exceeds 60 percent because the air cannot hold more moisture. Use frozen saltwater bottles or place bowls of ice directly in the fan airflow.
How long does the ice cooling effect last?
With regular ice cubes, cooling typically lasts two to three hours per batch. Using frozen saltwater bottles extends this duration. Keep backup frozen bottles in your freezer for quick swaps during extreme heat.
Is it safe to add water components to my fan?
Yes, it is safe if you follow proper precautions. Seal all electrical connections with hot glue, house electronics in waterproof boxes, and never operate the fan without insulation if water is present. Always place drip trays underneath to prevent slips.
Can I use these methods with any type of fan?
These methods work best with tower fans due to their vertical design and rear intake. However, the ice bowl method works with any fan type. PVC builds require adaptation based on your specific fan dimensions.