How to Take Apart Hawaiian Breeze Tower Fan
If your Hawaiian Breeze tower fan is making squeaky noises, not oscillating, or pushing dusty air around your room, a deep clean and repair is overdue. Learning how to take apart a Hawaiian Breeze tower fan gives you full control over restoring quiet operation and improved airflow without spending money on a replacement. This guide covers every step, from safe disassembly and hidden screw locations to the proper lubrication technique that stops squeaks for good.
With the right tools and careful technique, disassembly takes about 15 to 20 minutes. You will gain access to the blades, motor shaft, and oscillation gears, which are the areas most prone to dust buildup and wear. Most importantly, you will learn why WD-40 should never be used as a long-term fix and why white lithium grease is the secret to silent, smooth operation.
Essential Tools and Safety Preparation
Before opening the fan, gather the correct tools and follow safety steps to avoid electrical hazards or broken plastic clips.
Gather Required Tools
Use these tools for a smooth, damage-free disassembly.
- Phillips screwdriver for removing housing, base, and motor screws
- Flat-head screwdriver for prying open internal clips and loosening tight carousel screws
- Plastic prying tool to hold clips open without scratching plastic surfaces
- Soft brush and toothbrush for scrubbing dust from blades and crevices
- Clean rags for wiping down components and applying grease safely
- White lithium grease as the only recommended lubricant for long-term noise reduction
Avoid WD-40 because it evaporates quickly and strips away existing grease, which actually worsens squeaks within weeks.
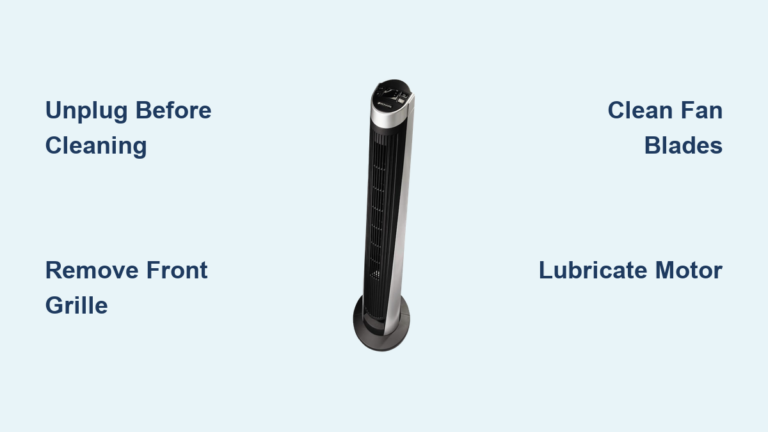
Power Down and Unplug
- Turn the fan off using the control panel.
- Unplug the power cord from the wall outlet.
- Locate the cable tie near the base and loosen it to free the cord during disassembly.
This prevents strain on internal wiring when separating the housing halves.
Remove Base and Housing Screws

The outer shell is held by visible screws and hidden internal clips. Start by removing all screws to prepare for panel separation.
Locate and Remove All Screws
Flip the fan upside down to access the base.
- Two base screws: Remove both Phillips-head screws securing the top tower to the base.
- Top housing screw: Found at the upper edge of the back panel.
- Bottom back screw: Hidden under a small rubber foot. Peel it back gently to reveal the screw.
Some models like Tower Aloha Breeze use two top bolts and one bottom bolt instead. Remove all three and keep them organized. Note if any screws have washers, as these often go on motor housing screws and must be reinstalled in the correct positions.
Release Internal Clips Safely
Once screws are out, the housing is still locked by five internal plastic clips along the back panel seam. Forcing the case open will break these clips.
Pry Open Clips Without Damage
- Use a flat-head screwdriver to gently insert into the bottom seam between the front and back panels.
- Twist slowly until you hear a pop, which releases one clip.
- Immediately insert a plastic prying tool into the gap to prevent the clip from snapping back into place.
- Work your way up the seam, releasing one clip at a time.
- Repeat on the opposite side if your model has side slots, as some have three to four small slots per side.
Pro Tip: Good lighting helps significantly. You will often need a flashlight to see the slots clearly.
Once all clips are released, the back panel should come off smoothly. Pull the power cord free from the housing channel carefully.
Extract the Fan Carousel Blade Assembly

With the housing open, you can now remove the spinning blade unit for cleaning.
Remove Top Cover and Screws
- Locate two Phillips screws at the top of the carousel and remove them.
- Gently slide off the top cover, which is attached to a plastic frame with a rubber gasket.
- Do not separate the gasket from the frame. Remove the entire unit as one piece to preserve the seal.
Detach Bottom Carousel Screw
- Find the Phillips screw at the bottom of the blade assembly that secures it to the motor shaft.
- This screw is often very tight due to vibration over time.
- Use a flat-head screwdriver to stabilize the motor shaft while loosening the screw.
Slide Off the Blade Assembly
- Once the bottom screw is removed, slide the carousel straight up and off the metal drive shaft.
- Set it aside for cleaning.
Visual Cue: If the shaft looks dry, rusty, or has old residue, that is likely the source of squeaking noises.
Access Motor and Oscillation Components
Now that the blades are out, you can reach the motor, gears, and oscillation system.
Remove Motor Bracket Screws
- Inside the housing, locate the two screws holding the motor bracket.
- These often have a flat or recessed head to distinguish them from other screws.
- Remove both carefully and set aside.
Open Motor Housing
The motor is enclosed in a housing secured by seven screws.
- Three screws on one side
- Two screws on the opposite side
- Two screws on the back
Some include washers. Keep track of their positions for correct reassembly.
Carefully remove all seven screws and lift off the housing to expose the motor and internal gears.
Diagnose and Replace Oscillation Motor
If your fan will not oscillate or makes grinding noises, the synchronous oscillation motor is likely worn.
Identify the Oscillation Motor
- Locate the small motor near the base that drives the gear system swinging the fan left and right.
- This is not a lever system. It uses a motorized gear train.
- It is secured by two screws and connected via two wires.
Remove Old Motor
- Unscrew the two mounting screws.
- Disconnect the wires. If they are soldered or crimped, you may need to cut them for removal.
Install Replacement Motor
- Purchase a generic synchronous oscillation motor, which is interchangeable across most tower fan models.
- Test fit first because some replacement motors have slightly longer shafts that can cause binding in one oscillation direction.
- If the shaft is too long, it may restrict movement. You can either accept slight unevenness and still function or carefully trim the shaft with a Dremel or file.
Reconnect Wiring
- Twist wire ends together and secure with electrical tape and heat shrink tubing.
- Route wires neatly to avoid pinching during reassembly.
Post-Repair Result: Oscillation speed improves from 4 to 5 cycles per minute to 5 to 6 cycles per minute.
Clean All Components Thoroughly
Now that everything is apart, clean each part to restore performance.
Wash the Fan Carousel
- Rinse the blade assembly under lukewarm water.
- Use a soft brush to scrub dust from blades and inner housing.
- For tight spots, use an old toothbrush.
- Dry completely before reassembly. Any moisture can cause electrical issues.
Clean Housing and Panels
- Wipe the inside of the housing with a damp cloth and mild soap.
- Use the toothbrush to clean corners and clip areas.
- Avoid getting water near the motor compartment or wiring.
Dry-Clean Oscillation Parts
- Use a dry cloth to wipe the oscillation arm, gear housing, and pivot points.
- Remove old grease, dust, and debris that cause resistance.
Warning: Never submerge the motor or allow water to touch electrical contacts.
Lubricate for Silent Operation

Cleaning alone will not stop squeaks. Lubrication is essential for smooth, quiet operation.
Why WD-40 Fails
WD-40 is a degreaser, not a lubricant. It evaporates within two weeks and washes away existing grease, leaving metal parts dry and prone to noise. This temporary solution makes things worse over time.
Use White Lithium Grease
White lithium grease is the only recommended lubricant for Hawaiian Breeze fans because it withstands heat and vibration, resists water, lasts months to years, and is safe for plastic and metal components.
Apply Grease Correctly
- Wipe the motor shaft and bearing hole with a dry cloth.
- Apply a small dab of white lithium grease to the shaft.
- Work it in by hand, sliding the shaft in and out to distribute evenly.
- Add a thin layer to the top end of the shaft.
- Lubricate the pivot points where the cage moves up and down.
- Apply a few drops of oil or grease to the top motor bearing.
Caution: If using aerosol grease, spray it onto a rag first. Never spray directly into the unit.
Reassemble in Reverse Order
Reassembly is the reverse of disassembly, but precision matters for proper function.
Reinstall the Carousel
- Slide the blade assembly back onto the motor shaft.
- Reattach the bottom screw and tighten securely.
- Place the top cover with gasket and secure with two top screws.
Reattach Motor Housing
- Align the motor housing and reinstall all seven screws.
- Snug them down, but do not overtighten. This can crack the plastic.
Close the Housing
- Align the front and back panels carefully.
- Press along the seams until all internal clips snap into place.
- Listen for solid clicks. No gaps should remain.
Reconnect Base and Cables
- Slide the base back under the tower.
- Reinstall the two base screws.
- Replace the top and bottom housing screws or two top bolts and one bottom bolt.
- Feed the power cord through the protective channel and re-secure the cable tie.
Test and Maintain for Longevity
Plug in the fan and test all functions to ensure everything works properly.
Check All Functions
- Power on at different speeds.
- Check for smooth airflow.
- Activate oscillation if applicable.
- Listen for squeaks or grinding sounds.
Fix Common Reassembly Issues
- Fan will not oscillate? Check if motor wires are connected and the gear is engaged.
- Squeak persists? You may need to add more grease to the shaft.
- Panel will not close? A clip is misaligned. Gently pry and reseat.
Set a Maintenance Schedule
Keep your fan running quietly and efficiently with regular care.
- High-dust homes or pet owners: Clean every 3 to 6 months.
- Low-dust environments: Once per year is sufficient.
- Re-lubricate annually even if the fan seems quiet to prevent wear.
Warning Signs to Act On: Increased noise, reduced airflow, visible dust blowing out, or intermittent oscillation mean it is time to disassemble, clean, and lubricate.
Frequently Asked Questions About Taking Apart Hawaiian Breeze Tower Fans
How do I know if my Hawaiian Breeze fan needs disassembly?
Disassembly is needed when the fan develops persistent squeaking, stops oscillating, has reduced airflow, or blows visible dust. These symptoms indicate dust buildup on the blades, dry motor bearings, or a worn oscillation motor.
What tools do I need to take apart a Hawaiian Breeze tower fan?
You need a Phillips screwdriver, flat-head screwdriver, plastic prying tool, soft brush, toothbrush, clean rags, and white lithium grease. Having good lighting or a flashlight is essential for seeing hidden clips and screws.
Why should I avoid using WD-40 on my tower fan?
WD-40 is a degreaser that evaporates quickly, usually within two weeks. It strips away existing grease and leaves metal parts dry, which actually causes more squeaking. White lithium grease is the proper lubricant that lasts months to years.
How often should I clean my Hawaiian Breeze tower fan?
In high-dust environments or homes with pets, clean the fan every 3 to 6 months. In low-dust environments, once per year is sufficient. Increase frequency if you notice increased noise, reduced airflow, or dust blowing out.
Can I replace the oscillation motor myself?
Yes. The synchronous oscillation motor is secured by two screws and connected via wiring. Replacement motors are generic and interchangeable. Just be aware that some replacement motors have slightly longer shafts that may cause minor oscillation restriction in one direction.
How long does it take to take apart and reassemble the fan?
With the right tools and following this guide, the entire process takes about 15 to 20 minutes. The disassembly itself is straightforward once you know the locations of hidden screws and clips.
Key Takeaways for Maintaining Your Hawaiian Breeze Tower Fan

Taking apart your Hawaiian Breeze tower fan is a straightforward process that takes 15 to 20 minutes with the proper tools. The key steps involve locating all screws including the hidden one under the rubber foot, releasing the five internal clips carefully without forcing them, and properly cleaning and lubricating the motor shaft with white lithium grease for lasting results.
The most common mistakes to avoid are using WD-40 instead of proper lubricant, forcing the housing clips open without using a prying tool, and overlooking the hidden screw under the rubber foot. By following the reverse-order reassembly process and testing all functions afterward, you can restore quiet operation and extend the life of your fan significantly.
Regular maintenance every 3 to 6 months in dusty environments or annually in clean spaces, combined with annual lubrication, keeps your Hawaiian Breeze tower fan running smoothly for years to come.