How to Make a Mini Fan: Quick Steps
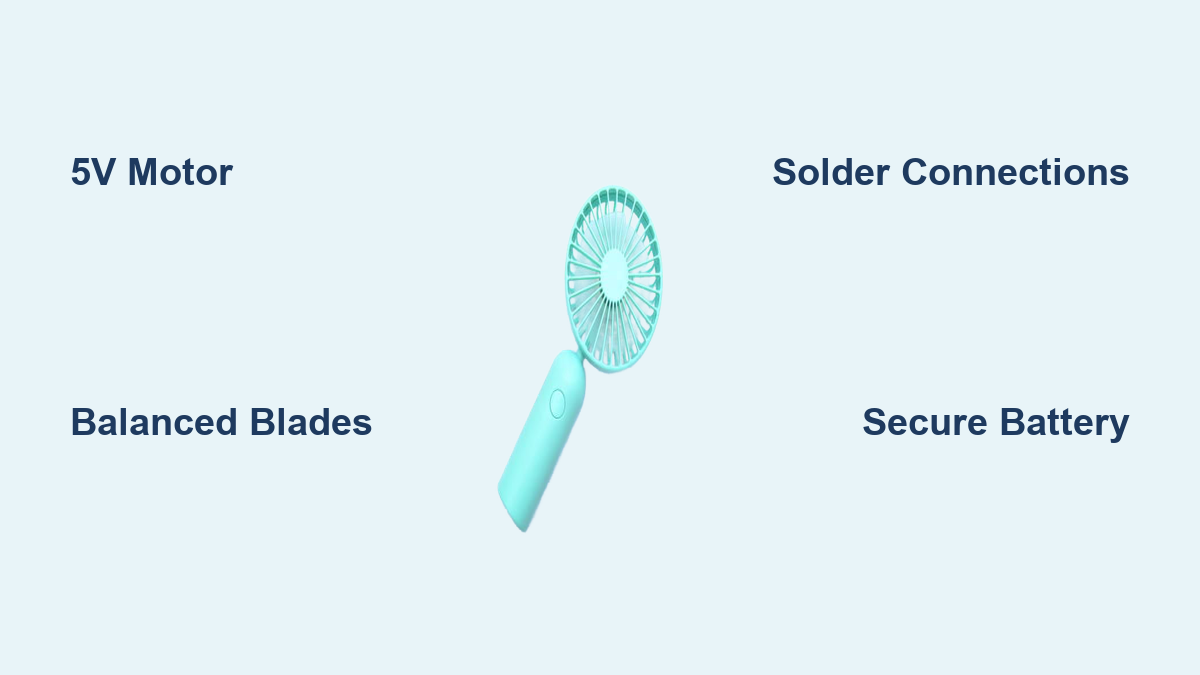
You’ve felt the summer heat creeping in, and a store-bought fan is too bulky or expensive. What if you could build your own mini fan in under an hour, compact, rechargeable, and fully customizable? With basic electronics and a few affordable parts, making a mini fan is not only possible but surprisingly simple. This guide walks you through every step: choosing the right motor, assembling the circuit, mounting the blades, and testing your creation. Whether you’re powering it with AA batteries or a USB-charged lithium cell, this project balances performance, portability, and safety. By the end, you’ll have a working personal cooler perfect for camping, hiking, or desk use, and the confidence to build even more DIY electronics.
Choose the Right Motor for Your Mini Fan
Pick a 5V DC Motor for Best Performance
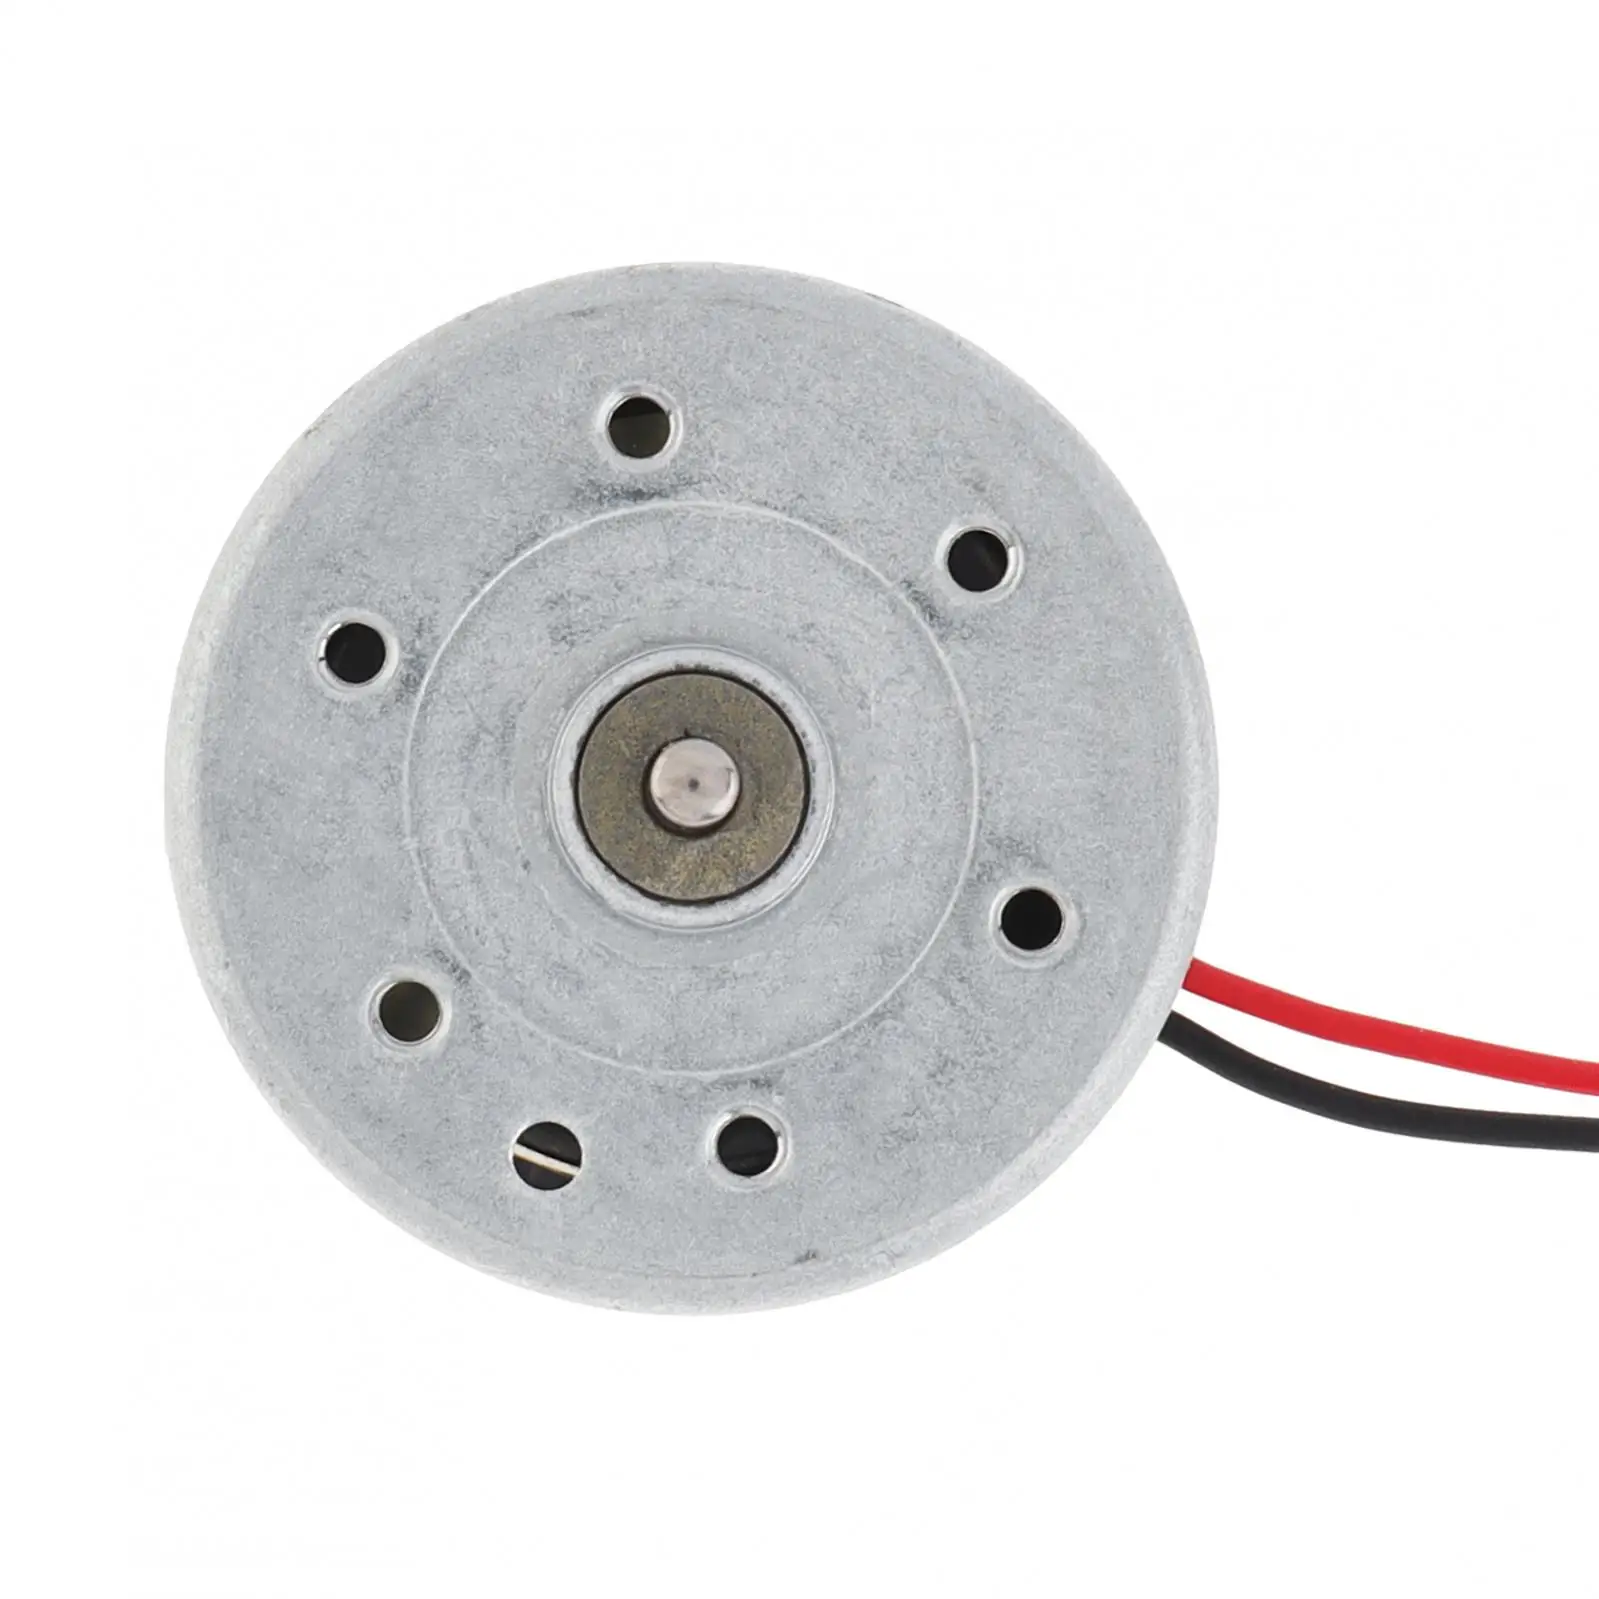
Start with a 5V DC motor as your core component. This voltage strikes the ideal balance between power and efficiency. While motors range from 4V to 12V, higher voltages drain batteries quickly and increase safety risks. A 5V motor runs smoothly on common power sources like USB ports or small battery packs, making it perfect for portable builds. Before purchasing, check that the motor shaft diameter matches your fan blades, typically 2 to 3mm for hobby motors. Spin the shaft by hand to ensure it rotates freely without resistance or grinding sounds.
Test Motor Before Assembly
Always test the motor before gluing or wiring it into your housing. Connect the motor leads directly to a 5V power source, such as a USB cable or AA battery pack. If it spins smoothly without noise or vibration, it’s ready for installation. If you notice resistance or irregular spinning, check for internal damage or shaft misalignment. This five-minute test prevents wasted effort and ensures your core component functions properly.
Select Your Power Source

Use 4xAA Batteries for Simplicity
A 4xAA battery pack delivers approximately 6V (1.5V per alkaline cell), which works excellently with 5V motors. This setup is reliable, easy to wire, and uses widely available batteries. Secure the pack inside your housing using hot glue or Velcro straps. The main drawback is that standard AA batteries are not rechargeable unless you invest in NiMH rechargeable cells. This option works best for beginners who want plug-and-play power without soldering charging circuits.
Opt for 3.7V Li-ion With USB Charging
For a modern, rechargeable mini fan, use a 3.7V lithium-ion battery paired with a 5V USB charging module. These batteries are lightweight, high-capacity, and ideal for portable devices. If needed, add a step-up boost board to reach 5V output. Include a micro-USB or USB-C charging module so you can recharge from any power bank or wall adapter. This setup transforms your fan into a long-term tool instead of a disposable gadget that requires constant battery replacements.
Build the Fan Blades
/https://fbi.cults3d.com/uploaders/15515760/illustration-file/af77ede3-8c4c-416a-a365-439ba5f84799/DC-motor-fan-blade-5.jpg)
Design 3–4 Balanced Plastic Blades
Use 3 to 4 blades made from lightweight plastic material. Too few blades reduce airflow significantly, while too many increase motor load and slow rotation. Balance is critical because warped or uneven blades cause wobbling, noise, and reduced efficiency. You can 3D print blades using PLA for precision, cut them by hand from old plastic bottles or credit cards, or buy pre-made mini propellers online. Ensure the center hole fits snugly on the motor shaft, and sand rough edges for smoother airflow.
Secure Blades to Motor Shaft
Slide the blades onto the motor shaft and press firmly into position. If the fit feels loose, add a tiny drop of super glue or hot glue to lock it in place, but only after testing the rotation first. Never apply glue while the motor is powered or connected to a battery. Allow the adhesive to cure completely before powering on. A loose blade can fly off at high speed and create a serious safety hazard.
Assemble the Housing
3D Print or Handcraft a Stable Case
The housing holds everything together and protects moving parts from damage. For a custom fit and professional appearance, 3D print a case designed with a motor mount, battery compartment, and front grill to block fingers from spinning blades. For prototyping or budget builds, use a handmade enclosure made from plastic boxes, cardboard sealed with glue, or repurposed containers. Leave adequate space for airflow by cutting intake and exhaust vents large enough to allow smooth air movement.
Center the Motor Properly
Mount the motor in the center of the front panel. Misalignment causes blades to hit the housing during rotation, creating damage and noise. Use a ruler or caliper to measure equal distance from all sides. Once positioned, secure it with hot glue for fast temporary mounting or screws for durable long-term installation. Check clearance by spinning the blades manually. They should rotate freely with at least 3 to 5mm gap from the housing walls.
Wire the Electrical Circuit
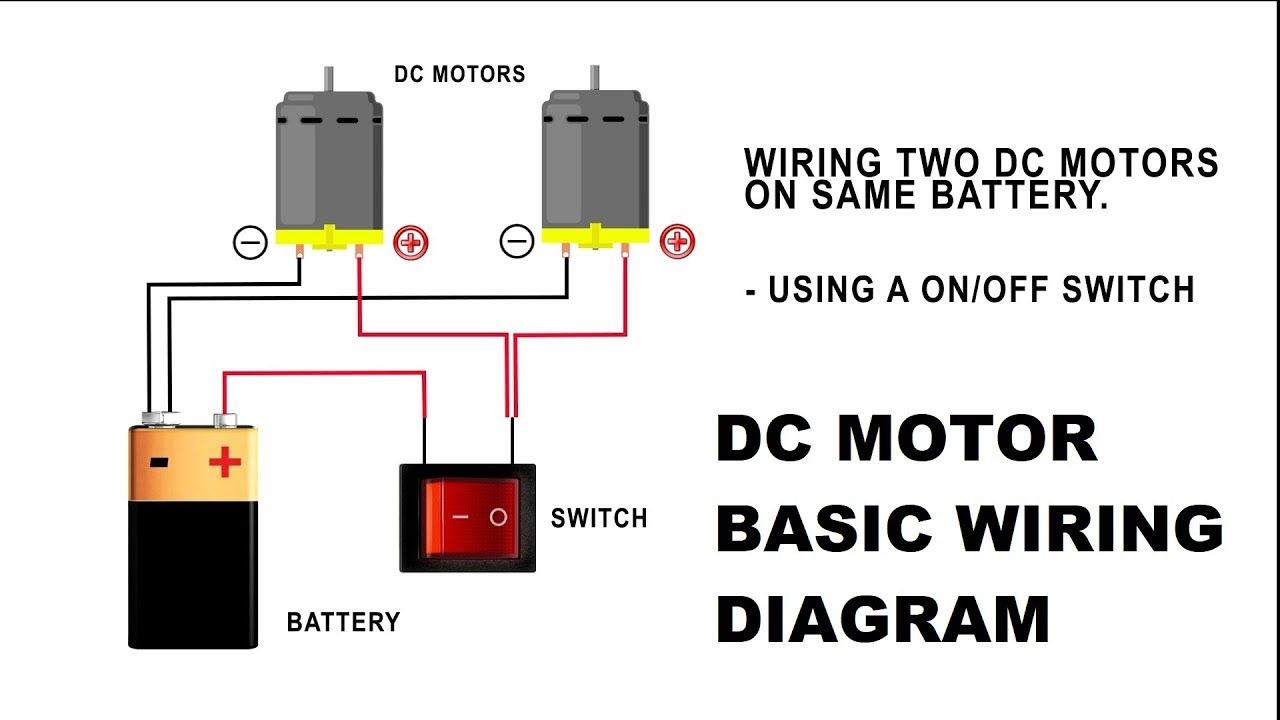
Connect Motor to Battery Safely
Now build the circuit by following this wiring sequence. First, cut two insulated wires, using red for positive and black for negative. Solder one wire from the motor’s positive terminal to the battery pack’s positive lead. Solder the second wire from the motor’s negative terminal to one terminal of the switch. Finally, connect the other switch terminal to the battery’s negative lead. This creates a complete circuit interrupted only by the switch. When flipped on, power flows from battery to switch to motor and back to battery.
Add a Charging Socket for Rechargeable Models
For rechargeable configurations, integrate a DC charging socket or USB charging module. Solder the positive and negative leads of the charging jack directly to the battery terminals, matching polarity carefully: red to red, black to black. Use a charging protection board if using lithium-ion cells to prevent overcharge or short circuits. Now you can plug in a 5V 500mAh charger to top up the battery anytime.
Solder and Insulate Connections
Use Solder for Durable Wiring
Twisted wires held together with tape won’t last. Solder all joints for strong, low-resistance connections that withstand vibration. Strip 5mm of insulation from wire ends, then twist matching wires together. Heat with a soldering iron, apply solder until it flows into the joint, and let cool without moving. Soldered connections resist vibration and prevent intermittent power loss during use.
Insulate Every Exposed Wire
Cover each solder point with heat-shrink tubing or electrical tape. Exposed metal can touch other components and cause a short circuit, which may overheat the battery or damage the motor. Double-check all connections and insulation before powering on. This step is essential for safety and device longevity.
Install the On/Off Switch
Mount Switch for Easy Access
Place the switch on the side or top of the housing for quick access. Drill a hole slightly smaller than the switch base so it snaps in tightly. Wire the switch into the negative line (ground) for safer operation. This way, the motor side stays de-energized when the switch is off. Flip the switch to test: the fan should start instantly. If it doesn’t respond, check all connections and verify battery charge.
Final Assembly and Testing
Secure All Components Inside
Before closing the housing, glue down the battery pack and reinforce motor and switch mounts. Tuck loose wires neatly to avoid contact with spinning blades. Use hot glue sparingly because excessive adhesive adds unnecessary weight. Ensure nothing blocks the blades or restricts the airflow path.
Test Rotation and Stability
Insert batteries or charge the unit, then turn on the switch and observe. If the spin is smooth, your fan is working correctly. If you notice wobbling, recheck blade balance and alignment. If you hear grinding noise, the blades may be hitting the housing. Remove the blades and remount them evenly to fix vibration issues.
Troubleshoot Common Issues
Fix No Power or Spinning
If the fan doesn’t turn, check these common causes. Battery charge is often the issue, so replace or recharge first. Verify switch function by bypassing it temporarily with a wire to test. Inspect solder joints for cold or broken connections. Test the motor directly by connecting leads straight to a power source. Most failures stem from loose wiring or dead batteries, not faulty motors.
Stop Wobbling Blades
Wobble indicates imbalance between blades. Solve this by reshaping bent blades, re-centering the hub on the shaft, or using a balancing app on your smartphone to detect vibration patterns. Even a 0.1g difference between blades can cause noticeable shaking. Trim excess material from heavier blades carefully to achieve balance.
Customize and Enhance Your Mini Fan
Add a Clip or Carry Loop
Make your fan more portable by gluing a clothespin-style clip to the back for attaching to hats, strollers, or desk edges. Alternatively, attach a nylon loop to hang the fan around your neck during outdoor activities. These small upgrades significantly increase usability in hiking, camping, and everyday carry scenarios.
Paint or Decorate the Housing
Personalize your build with acrylic paint or stickers to match your style. Let paint dry completely before reassembling. Avoid covering vents or switches with decorations. A unique design makes your fan stand out and encourages sharing your creation online.
Safety First: Avoid Hazards
Never Work on Live Circuits
Always remove batteries before adjusting wires or blades. Live circuits can spark, especially during soldering. One accidental short can ruin your battery or cause burns. Disconnecting power is the most important safety step in any electronics project.
Prevent Short Circuits
Double-insulate all connections and keep positive and negative wires separated. Use terminal blocks or connectors if you plan to disassemble often. Lithium-ion batteries can overheat or catch fire if shorted, so treat them with proper care and respect their power limitations.
Secure Blades Before Powering
A detached blade spinning at high speed can injure eyes or skin. Confirm tight blade attachment every time you recharge or transport the fan. Check the connection before each use to ensure safe operation.
Optimize for Real-World Use
Maximize Battery Life
Use a 5V motor with low current draw (under 300mA) and pair it with efficient batteries. A 2000mAh lithium-ion cell provides over 6 hours of runtime. Turn off the fan when not in use to extend battery life. This efficiency makes the fan practical for hiking, camping, and travel.
Improve Airflow Design
Angle the blades at 30 to 45 degrees for better thrust. Shape the housing like a cone or duct to direct airflow in a concentrated stream. Front grills should have wide openings because small holes block air movement and reduce cooling effectiveness.
Build Variants for Different Needs

Basic Non-Rechargeable Fan
This version uses a 5V motor, 4xAA battery pack, switch, and plastic housing. It offers simple construction with no charging circuit needed. Best for children’s projects or quick prototypes where reusability isn’t a priority.
USB-Rechargeable Mini Fan
This configuration uses a 3.7V lithium-ion battery, USB charging module, 5V motor, and boost converter. It recharges from any USB port and provides long-term value. Best for daily carry or eco-conscious users who want to reduce disposable battery waste.
High-Power Outdoor Model
This variant uses an 8 to 12V motor with an 8xAA battery pack and 4-blade propeller. It delivers strong airflow for camping or stationary outdoor use. The trade-offs are heavier weight and shorter runtime due to higher power consumption.
Share Your Creation
Document with Photos or Video
Record your build process from start to finish. Short videos showing motor testing, soldering, and the final spin test perform well on TikTok, Instagram Reels, or YouTube Shorts. Use hashtags like #DIYFan or #MiniFanBuild to reach makers worldwide who share your interests.
Join the DIY Community
Post your results online and ask for feedback from experienced builders. Many creators share 3D-printable case designs and circuit diagrams freely. You might inspire someone else to start their first electronics project while learning new techniques from the community.
Key Takeaways for Building Your Own Mini Fan
Building a mini fan teaches valuable electronics skills while creating a useful personal cooling device. The most critical steps are choosing a 5V motor for efficiency, properly balancing 3 to 4 plastic blades, and ensuring all electrical connections are soldered and insulated. Safety matters throughout: disconnect power before wiring, prevent short circuits, and secure blades firmly before testing. Whether you build the basic AA-powered version or the advanced USB-rechargeable model, you gain hands-on experience with motors, batteries, switches, and circuit design. Now gather your parts and start building your first mini fan.
Frequently Asked Questions About Making a Mini Fan
What voltage motor is best for a DIY mini fan?
A 5V DC motor provides the best balance between power and battery efficiency. It works with common power sources like USB ports and small battery packs, making it ideal for portable builds.
How long does it take to build a mini fan?
Most beginners can complete a basic mini fan in 30 to 60 minutes, including testing time. More advanced rechargeable models with USB charging may take slightly longer.
Can I use a rechargeable battery in my mini fan?
Yes. Use a 3.7V lithium-ion battery paired with a USB charging module for a modern rechargeable setup. This allows you to recharge from any USB power source.
Why do my fan blades wobble during rotation?
Wobbling usually indicates unbalanced blades. Check that all blades are equal in weight and shape. Reshape uneven blades or re-center the hub on the motor shaft to fix this issue.
What should I do if my fan doesn’t spin at all?
First, check battery charge and replace or recharge if needed. Then verify all wire connections and test the switch functionality. If problems persist, test the motor directly with a power source to determine if it’s faulty.